Lesson 5.1 in my own words
- All professional photographers edit their images.
- Film photography requires chemical baths to develop images. The final look of the photo is controlled by:
- temperature of developer bath
- length of time in fix bath
- Digital cameras are not designed to produce finished photographs.
- A digital image is just a file of basic information about color and tone levels.
- Digital images require developing (a.k.a. editing).
- JPEG images leave the editing to the camera.
- RAW images are unedited digital files enabling the photographer to edit as desired.
- There's a supplemental AYWMC lesson on RAW, so I'll make my notes in a separate post
- Editing software
- The choices for digital photographers are:
- Let the camera make the decisions
- Use software designed for digital photograph editing
- Use digital editing software is an extension of the camera.
- Most programs used by professionals are by purchase or monthly subscription fees.
- There are some decent free programs out there.
- Basic editing should include checking three things:
- Exposure - is the image correctly exposed?
- Use histogram in the software to check
- Check where the white point is located (the right hand side of the histogram)
- Underexposed images can be improved by moving the white point slider to touch the right side of the histogram.
- Color balance - do your indoor shots have a yellow cast?
- Possible editing tools to correct color balance:
- color temperature
- white balance
- neutral tone picker
- may vary depending on program used
- Cropping - can your image be improved by cropping?
- Some photographers think that cropping is amateurish; that professional photographers can perfectly compose and frame the image in the camera alone.
- To this, Emma Davies (our teacher) responds, "Says who? If you want to crop, then crop."
This week's project
- Choose a favorite image and check the 3 basic editing steps.
- As a photo prompt for images taken for this lesson, experiment with background separation.
- For every image taken in this week, use your editing software for basic editing as needed.
- Optional: Try experimenting with RAW images
I don't know if these are favorite images, but they contain issues that I want to learn to improve. I chose them so I could experiment with the editing features discussed in the lesson. I use GIMP because it's open source and free.
Photo 1: an indoor shot of a bowl of homegrown cherries. It has that yellowish cast indoor photos usually have from artificial lighting.
 |
Original photograph.
|
 |
| Cropped |
 |
Exposure adjusted to -1.
|
 |
Color temperature adjusted from 6500K (original) to 3550K
|
 |
Exposure -1 and color temperature 3550K
|
 |
Exposure -1 and color temperature 4314K
|
In the exposure dialog box are two sliders: exposure and black level. Black level wasn't mentioned in the lesson, but I experimented with it anyway.
 |
Exposure -0.3 and black level 0.01
|
 |
Exposure -0.3, black level 0.01, and temperature 3500K
|
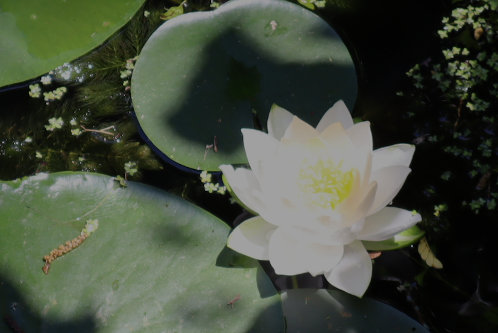
Photo 2: an outdoor photo of a white water lily in the sun. I wanted to experiment with this one because white anything in the sun always washes out. Can I fix it in GIMP?
 |
| Original |
 |
Cropped (so I can focus on the flower)
|
 |
Exposure -1
|
 |
White balance (an automated function in GIMP)
|
What I learned
- I wasn't terribly satisfied with any of the results, so I'm going to need a lot of practice with this. I use my editing software for a few things, but there is much on it that I'm clueless about.
- That GIMP seems to render exposure differently than the camera does. (I'm guessing this is because with the camera, I have three ways to control exposure: aperture, shutter speed, and ISO, plus exposure compensation).
- In the camera, exposure compensation affects brightness
- In GIMP, exposure control seems to add overall darkness to the image, i.e add a layer of gray. Hmm, wait a minute. This is something I learned about in the very first lesson, "Introduction to Exposure."
- I couldn't make sense of what the lesson meant about using the histogram to adjust exposure, so that's something I need to delve into.
- Conclusions
- It's best to make as many adjustments as possible with the camera. Editing may not be cheating, but it shouldn't be used as a crutch either.
- Not to photograph white objects in direct sun.
- That I need to do a course on how to use GIMP and all its features.
Next, I'm going to tackle RAW. Emma Davies Photography Blog has an excellent article explaining it, "
What is RAW and Why Do You Need It?" Then I'll take a look at the
Michael the Maven video I found on my specific camera (Canon M50), to learn how to use it to shoot RAW. I'll do a separate blog post on my notes and initial experiments with it.


0 Yorumlar